Taking Let's Encrypt for a Spin
A lot of folks have been very vocally pushing for “HTTPS Everywhere”, and for good reason. The fact that the lack of HTTPS makes you miss out on shiny new things like HTTP/2 and Service Workers adds even more incentive for those a little less inspired by the security arguments.
Unfortunately, moving to HTTPS can be kind of painful as you can see from Jeremy Keith’s excellent post detailing exactly how he got adactio.com onto HTTPS. He pinpoints the major obstacle with HTTPS adoption at the end of his post:
The issue with https is not that web developers don’t care or understand the importance of security. We care! We understand!
The issue with https is that it’s really bloody hard.
Let’s Encrypt—a new certificate authority from the Internet Security Research Group (ISRG)—has been promising to help with this, pledging to be “free, automated and open”.
They just announced public beta today, so I decided to give the beta version of their system a try on wpostats.com. Like Jeremy’s blog, WPO Stats is housed on a Digital Ocean virtual machine running Ubuntu 14.04 and Apache 2.4.7.
Getting Let’s Encrypt installed
The first thing I had to do was get the Let’s Encrypt client installed. To do this, I logged into the WPO Stats server and followed the instructions on the Let’s Encrypt repo.
First I grabbed the repo using git:
git clone https://github.com/letsencrypt/letsencrypt
Once git had done it’s magic and pulled down the Let’s Encrypt client, I needed to actually install it. To do that, I navigated to the newly created letsencrypt directory and then ran the Let’s Encrypt client with the help flag enabled.
cd letsencrypt
./letsencrypt-auto --help
This does that scary-looking thing where it downloads a bunch of different dependencies and gets the environment setup. It went off without a hitch and after a few moments it completed and told me I was ready to begin.
Obtaining and installing a certificate
The install process was smooth, but I was bracing myself for the actual SSL setup to be a bit more painful. As it turns out, I didn’t have to worry.
To run the client and get my certificate, I ran the same command without the help flag:
./letsencrypt-auto
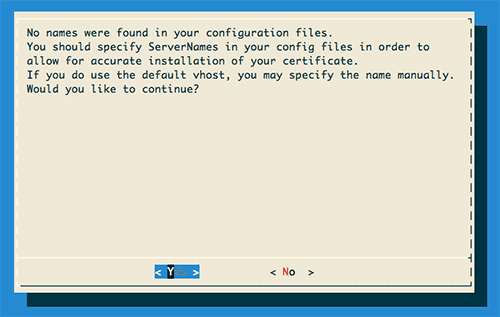
This popped up a pleasant little GUI (Figure 1) that walks through the rest of the process. The first screen it popped up was a warning.
No names were found in your configuration files. You should specific ServerNames in your config files in order to allow for accurate installation of your certificate. If you do use the default vhost, you may specify the name manually. Would you like to continue?

Figure 1: First screen of the letsencrypt client GUI banner.
In this case, I only use the server for WPO Stats—nothing more. This means that, yes, I use the default vhost. I selected ‘Yes’ and moved along. Where this might be different is if you were hosting multiple domain names on a single server. For example, if I ran this site on the same server, I may have virtual hosts set for both timkadlec.com and wpostats.com and would need to have that specified in my config files.
The next three prompts were straightforward. I had to enter my domain name, my email address, and then accept the terms of service. I’ve always liked easy questions.
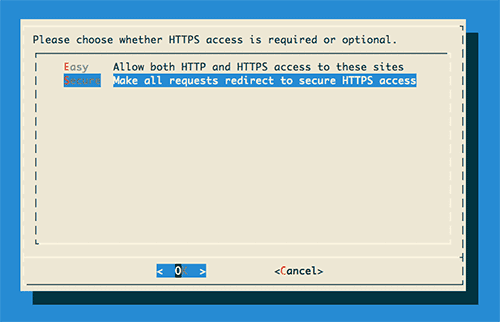
After that, I was prompted to choose whether I wanted all requests to be HTTPS, or if I wanted to allow HTTP access as well. I had no reason to use HTTP for anything, so I selected to make everything secure.

Figure 2: GUI screen for choosing to make everything HTTPS or keep HTTP around.
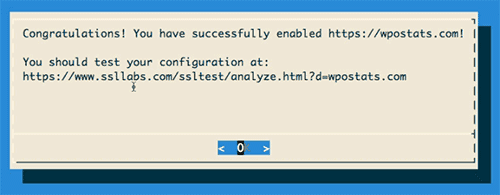
And, well, that was it. The next GUI prompt was informing me I was all set and that I should probably test everything out on SSL Labs.

Figure 3: Final screen of the letsencrypt GUI informing me I was victorious.
I checked the site, and everything was in working order. I ran the SSL Labs test and everything came back a-ok. For once, it really was as simple as advertised.
I felt like trying my luck so I went through the process again for pathtoperf.com and, again, it went through without a hiccup. All told it took me about 10 minutes and $0 to secure both sites. Not bad at all.
Going forward
The improvement between the obnoxiously complicated process Jeremy had to suffer through and the simplified process provided by Let’s Encrypt is absolutely fantastic.
I don’t want to mislead you—there’s work to be done here. I don’t know that every server is setup to be quite as smooth as the Apache process, and without root access to the server you still have to go through some manual steps.
UPDATE: It looks like Dreamhost is going to allow customers to generate and enable Let’s Encrypt certificates from the control panel. Hopefully other hosting providers will follow suit.
But that’s where they’ll need you. Try it out on your own servers and test sites and if you run into difficulties, let them know. I’m really optimistic that with enough feedback and input, Let’s Encrypt can finally make HTTPS everywhere a less painful reality.